

To turn waste into compost in a Marcytop compost tumbler, balance greens, browns, moisture, and oxygen. Add chopped organic waste, rotate the chamber regularly, and correct moisture whenever decomposition slows. A Marcytop compost tumbler makes this process easier through rotating chambers and controlled aeration. The need is substantial, since U.S. households contribute significantly to the nation’s food waste stream. EPA estimates that 66.2 million tons of wasted food came from residential, retail, and food-service sectors in 2019. About 60% of that waste reached landfills instead of useful recovery pathways.
Key Takeaways
- Use a balanced mixture of nitrogen-rich greens and carbon-rich browns.
- Cut large scraps into smaller pieces before adding them.
- Keep the contents damp like a wrung-out sponge, never saturated.
- Rotate the tumbler regularly to distribute oxygen and moisture.
- Stop adding fresh waste when one chamber enters the finishing stage.
- Harvest compost when it looks dark, crumbly, and smells earthy.
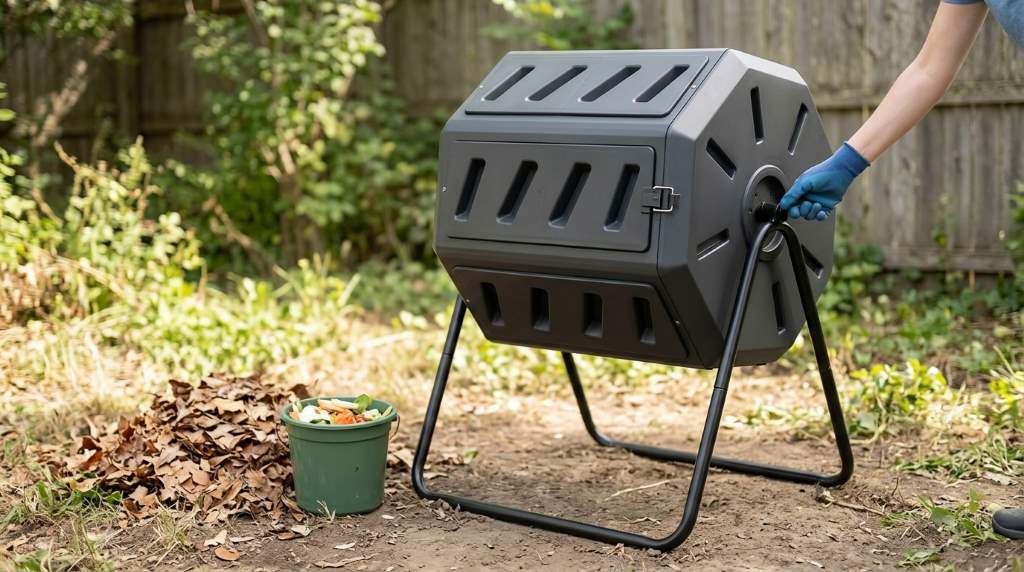
Start With the Right Waste Mixture
Successful composting starts before you rotate the Marcytop tumbler. The microbes need organic material, oxygen, moisture, carbon, and nitrogen to work efficiently. Therefore, simply filling the chamber with kitchen scraps will not produce reliable compost.
Think of compost materials as two functional groups: greens and browns. Greens supply nitrogen, while browns provide carbon and physical structure. Together, they create the biological balance that supports steady decomposition.
What Counts as Green Waste?
Green waste includes relatively fresh materials containing more nitrogen and moisture. Suitable examples include vegetable peels, fruit scraps, coffee grounds, fresh grass clippings, and plant trimmings.
However, do not interpret “green” as meaning only green-colored materials. Coffee grounds remain a nitrogen-rich compost ingredient despite their dark appearance. Similarly, fruit peels contribute moisture and nitrogen even when their colors vary.
What Counts as Brown Waste?
Brown materials supply carbon and help prevent the compost from becoming dense or excessively wet. Good options include dry leaves, shredded cardboard, untreated paper, straw, and small pieces of woody plant material.
Keep a supply of dry browns beside the tumbler. This simple habit lets you immediately correct wet food scraps without stopping your composting routine.
Prepare Waste Before Loading the Tumbler
Smaller pieces usually decompose faster because microbes can access more surface area. Therefore, chop fruit and vegetable scraps before placing them inside the chamber.
Cut thick stems, large leaves, and dense vegetable pieces into smaller sections. Shred cardboard and paper rather than adding large folded pieces that can mat together.
Avoid packing the chamber tightly with one material. Instead, distribute different materials throughout the load so air can move between particles.
Build the First Composting Load
Begin with a loose layer of coarse brown material inside the chamber. Dry leaves, shredded cardboard, or small plant pieces can create useful air spaces.
Next, add your kitchen scraps and other acceptable green materials. Follow them with another portion of dry browns to absorb excess moisture and improve structure.
You do not need to create perfectly measured layers. Instead, focus on maintaining a visibly balanced mixture throughout the chamber.
A Practical Loading Pattern
- Start with coarse browns for airflow.
- Add chopped kitchen scraps and fresh plant material.
- Cover wet greens with dry browns.
- Mix the materials rather than compressing them.
- Leave enough room for the contents to tumble freely.
This approach avoids a common tumbler mistake: treating the container like a trash can. Composting works best when you manage the biological conditions rather than simply adding waste.
Control Moisture Before You Turn the Waste
Moisture strongly influences decomposition speed, odor, and microbial activity. Your compost should feel damp, similar to a wrung-out sponge.
If the contents look dusty and dry, add a small amount of water while rotating. Avoid pouring large quantities because excess water can displace oxygen and create unpleasant odors.
If the mixture feels soggy, stop adding wet scraps temporarily. Instead, add shredded cardboard, dry leaves, or another absorbent brown material.
Use the Squeeze Test
Grab a small handful of composting material and squeeze it gently. The material should feel moist without releasing a stream of water.
If the material crumbles completely, add modest moisture. If water drips freely, add dry browns and rotate the chamber thoroughly.
How To Turn Waste in the Marcytop Tumbler
Close and secure the chamber before rotating the unit. Then use controlled movement to rotate the drum several times until the contents mix thoroughly.
Do not treat turning as a single quick spin. Rotate enough to redistribute wet scraps, dry browns, and partially decomposed material throughout the chamber.
After turning, return the chamber to a stable position. Regular rotation introduces oxygen while helping break apart compacted material.
How Often Should You Rotate It?
Rotate the tumbler every few days during active decomposition. Increase attention when the contents become compacted, wet, dry, or noticeably odorous.
More turning does not automatically produce better compost. Excessive handling can disturb the process unnecessarily, so aim for consistent aeration instead.
Use the Dual Chambers Strategically
The Marcytop design provides two separate composting chambers, which can support a continuous composting routine. Use one chamber for fresh waste while the other finishes decomposing.
Once one chamber becomes sufficiently full, stop feeding it fresh material. Begin adding new scraps to the second chamber while the first chamber continues breaking down.
This strategy solves a major problem with single-batch composting. You can keep producing kitchen waste without constantly disturbing a batch that needs time to mature.
When You Should Stop Adding Waste
Stop adding fresh material when the chamber reaches a practical fill level and becomes difficult to rotate. Overfilling can make the tumbler heavy and reduce effective mixing.
More importantly, stop feeding a chamber when you want a uniform finished batch. Fresh scraps introduced late can remain recognizable while older material appears finished.
What Not To Put Into the Tumbler
Backyard composters should avoid materials that create significant pathogen, odor, pest, or contamination concerns. Keep meat, dairy products, fats, grease, and pet waste out of ordinary home composting.
Avoid chemically treated materials and plants carrying serious diseases. Also keep large woody pieces outside unless you have chipped them into smaller fragments.
- Meat and fish scraps
- Dairy products
- Grease and cooking oils
- Pet feces and used pet litter
- Diseased plant material
- Chemically treated yard waste
- Large untreated branches
When uncertain about an item, check whether it can safely decompose under backyard conditions. A controlled municipal composting system can accept materials that a household tumbler should avoid.
Troubleshoot a Wet, Smelly, or Slow Batch
A healthy tumbler should not produce a persistent rotten or sewage-like odor. Strong smells usually indicate excessive moisture, too many greens, poor aeration, or compacted material.
First, add dry browns and rotate the chamber thoroughly. Then check whether the mixture feels excessively wet and whether material has formed dense clumps.
If the Compost Smells Bad
Add shredded cardboard or dry leaves to absorb excess moisture. Rotate the chamber several times to restore airflow throughout the mixture.
Then reduce the amount of fresh food scraps temporarily. Resume normal feeding after the mixture becomes looser and less saturated.
If Nothing Seems To Happen
Slow decomposition usually points toward inadequate moisture, insufficient nitrogen, poor particle size, or limited aeration. Check each condition before adding more waste.
If the mixture contains mostly dry leaves and cardboard, add nitrogen-rich greens. If it contains mostly food scraps, add dry browns instead.
If the Tumbler Becomes Difficult To Turn
A heavily loaded chamber can become difficult to rotate, especially after rain or excessive water enters the mixture. Never force the mechanism when the drum feels unstable.
Reduce the load if necessary and correct excessive moisture. A lighter, better-balanced chamber will usually rotate more predictably.
Know When Your Compost Is Ready
Finished compost looks significantly different from the original waste. It should appear dark, crumbly, relatively uniform, and earthy rather than wet or slimy.
You should also struggle to identify most of the original food scraps. A few resistant pieces can remain, but recognizable fresh waste indicates additional decomposition time.
Do not judge readiness solely by elapsed time. Temperature, moisture, particle size, ingredients, weather, and turning frequency can change the composting timeline.
Harvest and Cure the Finished Compost
When the material appears finished, stop adding new waste to that chamber. Give the remaining material additional time to stabilize before removing it.
Open the appropriate access door and place a container beneath the opening. Remove the finished material while leaving stubborn unfinished pieces inside for further decomposition.
If you want exceptionally stable compost, allow the harvested material to cure separately. Keep it lightly moist and protected from excessive rainfall while it stabilizes.
How To Get Better Results From Every Batch
Keep your process simple enough to repeat consistently. Store dry browns nearby, chop wet scraps, monitor moisture, and rotate the chamber regularly.
Also keep notes about what you add and how the mixture behaves. These observations can help you identify the best balance for your household waste and local conditions.
- Keep dry leaves or shredded cardboard ready.
- Chop large food scraps before loading.
- Check moisture whenever you add many wet scraps.
- Rotate the chamber consistently during active decomposition.
- Use the second chamber while the first batch finishes.
- Remove finished compost instead of continuously mixing new waste.
This routine turns composting from trial and error into a manageable household system. Over time, your observations become more useful than rigid recipes because every tumbler behaves differently.
Why Turning Matters More Than Simply Filling
Turning does more than mix ingredients together. It redistributes oxygen, moisture, and partially decomposed material throughout the chamber.
That airflow supports aerobic microorganisms responsible for breaking organic material down. Meanwhile, rotation helps prevent wet pockets from remaining compressed inside the load.
However, turning cannot compensate for a fundamentally unbalanced mixture. Good aeration works best alongside appropriate moisture, carbon, nitrogen, and particle size.
Common Mistakes That Slow Composting
The most common mistake involves adding food scraps without enough dry material. That habit often creates a wet, compacted mixture that smells unpleasant.
Another mistake involves adding fresh waste indefinitely to a chamber intended for finished compost. This creates different decomposition stages that never mature uniformly.
Finally, many beginners rotate the tumbler aggressively but ignore moisture. Turning helps, but the microbes still need the right environment to keep working.
Frequently Asked Questions
How often should I turn a Marcytop compost tumbler?
Rotate it every few days during active decomposition, adjusting frequency when moisture, odor, or compaction changes.
Can I put kitchen scraps directly into the Marcytop tumbler?
Yes, but chop the scraps and balance them with dry carbon-rich materials such as leaves or shredded cardboard.
Why does my compost tumbler smell bad?
A bad smell usually signals excess moisture, too many greens, insufficient airflow, or compacted material.
How do I know when tumbler compost is finished?
Finished compost typically looks dark and crumbly, smells earthy, and contains few recognizable original ingredients.
Can I keep adding waste while compost finishes?
Use the second chamber for fresh waste so the finishing batch can decompose without repeated disturbance.
Final Thoughts
Turning waste into useful compost requires more than rotating a container. You need balanced ingredients, suitable moisture, adequate oxygen, sensible loading, and patience.
Start with small, chopped scraps and plenty of dry browns, then rotate the chamber consistently. When one batch reaches the finishing stage, let the second chamber handle your fresh waste.
Use these practices with your Marcytop tumbler and monitor how each batch responds. Start your next compost batch today, and turn everyday organic waste into a valuable soil amendment.
