

There’s something deeply satisfying about planting seeds and watching them grow into thriving plants. But anyone who’s tried planting by hand knows how inconsistent the results can be. I still remember my first attempt at planting a row of carrots. The seeds were unevenly spaced, some were buried too deep, and others barely covered. That’s when I discovered the magic of a seed dibber tool. It wasn’t just about making the job easier—it was about precision, consistency, and giving every seed the best possible start. A good dibber ensures uniform depth and spacing, which are critical for healthy germination and growth.
If you’re serious about gardening, understanding the proper use of a seed dibber tool can transform your planting process. According to a study by the University of Massachusetts Amherst, consistent planting depth and spacing can improve germination rates by up to 40%, leading to stronger, more uniform plants. Whether you’re a beginner or a seasoned gardener, a seed dibber is an essential tool for achieving professional-level results.
Why a Seed Dibber Tool Is Essential for Accurate Planting
A seed dibber tool is a simple yet powerful device designed to create uniform planting holes at the perfect depth and spacing for your seeds. Unlike planting by hand, which can lead to inconsistent results, a dibber ensures that every seed is placed at the optimal depth for germination. This consistency is crucial because seeds planted too deep may struggle to emerge, while those planted too shallowly can dry out or be washed away. According to Gardener’s Supply Company, using a dibber can also reduce seed waste, as you’re less likely to plant too many or too few seeds in any given area.
Additionally, a seed dibber tool saves you time and effort. Instead of painstakingly measuring and digging each hole by hand, you can quickly and efficiently create a row of perfectly spaced planting holes. This is especially useful for gardeners planting large areas or multiple rows of crops. For those who practice precision gardening, such as square foot gardening or biointensive methods, a dibber is an invaluable tool for maintaining consistent spacing and depth.
For organic gardeners, a seed dibber also allows you to plant seeds without disturbing the soil structure excessively. This preserves the delicate balance of your garden’s ecosystem, promoting healthier soil and plants. Whether you’re planting vegetables, flowers, or herbs, a seed dibber can help you achieve more accurate, efficient, and successful results.
Types of Seed Dibber Tools
Seed dibber tools come in a variety of styles, each with its own advantages and ideal uses. Here are some of the most popular types to consider:
1. Traditional Wooden Dibber
The traditional wooden dibber is a simple, time-tested tool that’s been used by gardeners for generations. It typically features a long, cylindrical or tapered wooden shaft with a pointed or flat end for creating planting holes. Wooden dibbers are lightweight, easy to use, and often come with measurement markings to help you achieve consistent depth and spacing.
Additionally, wooden dibbers are often made from durable hardwoods like beech or ash, which can withstand the rigors of regular use. They’re a great choice for gardeners who prefer a classic, no-frills tool that’s both practical and aesthetically pleasing.
2. Adjustable Dibber
An adjustable dibber allows you to customize the depth and spacing of your planting holes to suit different types of seeds or plants. These dibbers often feature a sliding or interchangeable tip that can be adjusted to create holes of varying sizes. This makes them a versatile option for gardeners who plant a variety of crops with different requirements.
Additionally, adjustable dibbers often come with measurement markings or depth gauges to help you achieve precise, consistent results. This can be especially useful for gardeners who want to experiment with different planting techniques or who grow a wide range of plants.
3. Multi-Row Dibber
A multi-row dibber is designed for gardeners who need to plant multiple rows of seeds at once. These dibbers feature several tines or tips that create a series of planting holes in a single pass. Multi-row dibbers are ideal for large-scale planting or for gardeners who want to save time and effort.
Additionally, multi-row dibbers often come with adjustable spacing options, allowing you to customize the distance between rows to suit your specific needs. This can be especially useful for gardeners who practice precision planting methods, such as square foot gardening or biointensive gardening.
4. Wheel Dibber
A wheel dibber is a rolling tool that creates planting holes as you push it along the soil. It typically features a wheel with several spikes or tines that press into the ground to create evenly spaced holes. Wheel dibbers are ideal for gardeners who want to plant large areas quickly and efficiently, with minimal effort.
Additionally, wheel dibbers often come with adjustable spacing and depth options, allowing you to customize the tool to suit different types of seeds or plants. This can be especially useful for gardeners who plant in rows or who want to achieve consistent results across large areas.
5. Handheld Seed Dibber
A handheld seed dibber is a compact, portable tool designed for precision planting in small or tight spaces. It typically features a short handle and a pointed or flat tip for creating planting holes. Handheld dibbers are ideal for gardeners who plant in containers, raised beds, or other confined areas where larger tools may not fit.
Additionally, handheld dibbers often come with ergonomic handles or grips for added comfort and control. This makes them a practical and convenient choice for gardeners who want to plant with accuracy and ease.
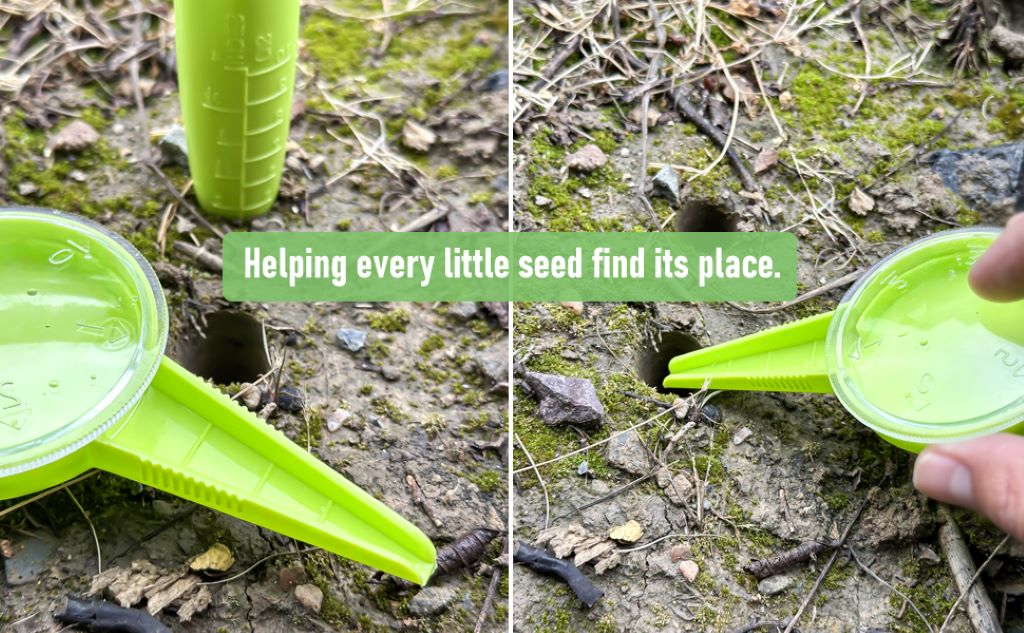
How to Use a Seed Dibber Tool for Accurate Planting
Using a seed dibber tool effectively can make all the difference in the success of your garden. Here’s a step-by-step guide to help you get the most out of your dibber:
1. Prepare Your Soil
Before you begin planting, make sure your soil is prepared and ready for seeds. Remove any weeds, rocks, or debris that could interfere with your planting or compete with your seeds for resources. Additionally, loosen the soil to a depth of at least 6-12 inches to ensure the roots have plenty of space to grow and establish.
Additionally, consider adding organic matter, such as compost or well-rotted manure, to your soil before planting. This can improve soil fertility, structure, and water retention, providing a boost to your seeds’ germination and growth.
2. Choose the Right Depth
The depth of your planting holes is critical for the success of your seeds. Different types of seeds have different depth requirements, so make sure to check the specific recommendations for the seeds you’re planting. As a general rule, most seeds should be planted at a depth of about two to three times their diameter. For example, small seeds like lettuce or carrots may only need to be planted about 1/4 to 1/2 inch deep, while larger seeds like beans or peas may require a depth of 1 to 2 inches.
Additionally, consider the type of soil you’re planting in. In lighter, sandier soils, you may need to plant seeds slightly deeper to ensure they have enough moisture to germinate. In heavier, clay soils, you may need to plant seeds slightly shallower to prevent them from becoming waterlogged or compacted.
3. Mark Your Rows
Before you start planting, mark your rows to ensure consistent spacing and alignment. You can use a string line, a garden hose, or even a straight piece of wood to create a guide for your rows. This can help you achieve straight, evenly spaced rows and avoid overcrowding or uneven planting.
Additionally, consider the spacing between your rows. Different plants have different spacing requirements, so make sure to follow the recommendations for the specific seeds you’re planting. This can help ensure your plants have enough room to grow and thrive without competing for resources.
4. Create the Planting Holes
Using your seed dibber tool, press the tip into the soil to create planting holes at the desired depth and spacing. For traditional or handheld dibbers, insert the tip into the soil and lift it out to create the hole. For wheel dibbers, roll the tool along the soil to create a series of evenly spaced holes in a single pass.
Additionally, consider the spacing between your planting holes. Different plants have different spacing requirements, so make sure to follow the recommendations for the specific seeds you’re planting. This can help ensure your plants have enough room to grow and develop without competing for resources.
5. Plant Your Seeds
Once you’ve created your planting holes, it’s time to plant your seeds. Drop one or two seeds into each hole, following the specific recommendations for the seeds you’re planting. For smaller seeds, you may need to use your fingers or a small tool to place them precisely in the hole. For larger seeds, you can simply drop them in by hand.
Additionally, consider the spacing between your seeds. Some seeds, like carrots or radishes, may require more precise spacing to prevent overcrowding and ensure proper growth. Others, like beans or peas, may be more forgiving and can be planted with slightly less precision.
6. Cover and Water
After planting your seeds, cover the holes with soil, gently pressing it down to ensure good seed-to-soil contact. Avoid compacting the soil too tightly, as this can restrict root growth and water infiltration. Once your seeds are planted, water the area thoroughly to help settle the soil and encourage germination.
Additionally, consider the watering needs of your seeds in the days and weeks following planting. Keep the soil consistently moist but not waterlogged, as this can help the seeds germinate and establish without becoming stressed or damaged.
Common Mistakes to Avoid When Using a Seed Dibber Tool
Even with the best intentions, it’s easy to make mistakes when using a seed dibber tool. Here are some common pitfalls to avoid:
1. Planting at the Wrong Depth
Planting your seeds at the wrong depth can lead to poor germination, stunted growth, or even seed rot. Avoid planting seeds too deep or too shallow, as this can prevent them from emerging or cause them to dry out. Instead, follow the specific depth recommendations for the seeds you’re planting, and use your dibber to create holes at the correct depth.
Additionally, consider the type of soil you’re planting in. In lighter, sandier soils, you may need to plant seeds slightly deeper to ensure they have enough moisture to germinate. In heavier, clay soils, you may need to plant seeds slightly shallower to prevent them from becoming waterlogged or compacted.
2. Overcrowding Your Seeds
Overcrowding your seeds can lead to competition for resources, such as water, nutrients, and sunlight. Avoid planting too many seeds in each hole or spacing them too closely together, as this can result in stunted growth, poor health, and reduced productivity. Instead, follow the spacing recommendations for the specific seeds you’re planting to ensure they have enough room to grow and thrive.
Additionally, consider the mature size of your plants when spacing them out. Some plants, like tomatoes or squash, can grow quite large and may require more space than smaller plants like lettuce or herbs.
3. Skipping Soil Preparation
Skipping soil preparation can lead to poor germination, weak growth, or even seed rot. Avoid planting seeds in unprepared or compacted soil, as this can prevent them from establishing and growing properly. Instead, take the time to loosen the soil, remove weeds and debris, and add organic matter before planting.
Additionally, consider the moisture level of your soil. Planting seeds in soil that’s too dry or too wet can lead to poor germination or stress. Aim for soil that’s slightly moist but not waterlogged, as this can provide the best environment for your seeds to germinate and grow.
4. Not Marking Your Rows
Not marking your rows can lead to uneven spacing, overcrowding, or crooked rows. Avoid planting seeds without a guide or marker, as this can result in inconsistent results and a less productive garden. Instead, use a string line, garden hose, or other marker to create straight, evenly spaced rows.
Additionally, consider the spacing between your rows. Different plants have different spacing requirements, so make sure to follow the recommendations for the specific seeds you’re planting. This can help ensure your plants have enough room to grow and thrive without competing for resources.
5. Forgetting to Water
Watering is critical for helping your seeds germinate and establish. Avoid neglecting to water your seeds after planting, as this can lead to poor germination or stress. Instead, water the area thoroughly immediately after planting to help settle the soil and encourage germination.
Additionally, consider the watering needs of your seeds in the days and weeks following planting. Keep the soil consistently moist but not waterlogged, as this can help the seeds germinate and establish without becoming stressed or damaged.
Tips for Getting the Most Out of Your Seed Dibber Tool
To maximize the benefits of your seed dibber tool, follow these tips for accurate, efficient, and successful planting:
1. Use the Right Dibber for the Job
Different seed dibber tools are designed for different tasks, so make sure to choose the right one for your specific needs. For example, a traditional wooden dibber is ideal for small-scale planting or for gardeners who prefer a classic, no-frills tool. An adjustable dibber may be better suited for gardeners who plant a variety of crops with different depth and spacing requirements.
Additionally, consider the size and shape of your dibber. A tool with a long, narrow tip may be better for creating deep, precise planting holes, while a tool with a wider, flat tip may be more suitable for shallow or large seeds.
2. Calibrate Your Dibber
Before you begin planting, calibrate your dibber to ensure it’s creating holes at the correct depth for your seeds. You can do this by testing the dibber in a small section of soil and measuring the depth of the holes it creates. Adjust the dibber as needed to achieve the desired depth.
Additionally, consider the type of soil you’re planting in. In lighter, sandier soils, you may need to adjust your dibber to create slightly deeper holes. In heavier, clay soils, you may need to adjust it to create slightly shallower holes.
3. Plant in Straight Rows
Planting in straight rows can improve the appearance and productivity of your garden. Use a string line, garden hose, or other marker to create a guide for your rows, ensuring they’re straight and evenly spaced. This can help you achieve more consistent results and make your garden look more professional and organized.
Additionally, consider the spacing between your rows. Different plants have different spacing requirements, so make sure to follow the recommendations for the specific seeds you’re planting. This can help ensure your plants have enough room to grow and thrive without competing for resources.
4. Use a Seed Dibber with a Seed Dispenser
Some seed dibber tools come with a built-in seed dispenser, which can help you plant seeds more quickly and accurately. These dibbers often feature a small hopper or container that holds the seeds and dispenses them into the planting holes as you create them. This can be especially useful for gardeners planting large areas or multiple rows of crops.
Additionally, consider the type of seeds you’re planting. Some seeds, like carrots or lettuce, may be too small or delicate for a seed dispenser. Others, like beans or peas, may be more suitable for this type of tool.
5. Maintain Your Dibber
To keep your seed dibber tool looking and performing its best, follow these tips for maintenance and care:
- Rinse your dibber with water after each use to remove soil and debris.
- Dry it thoroughly to prevent rust or deterioration, especially if it’s made from metal or wood.
- Store it in a dry, safe place when not in use.
- Sharpen the tip occasionally with a file or sandpaper to maintain its effectiveness.
- Apply a light coat of oil or wax to wooden dibbers to prevent drying or cracking.
Additionally, consider the material of your dibber when choosing maintenance methods. For example, wooden dibbers may require occasional sanding or oiling to maintain their appearance and performance, while metal dibbers may need to be sharpened or lubricated.
The Benefits of Using a Seed Dibber Tool
Using a seed dibber tool offers a variety of benefits that can transform your planting process and the success of your garden. Here are some of the most notable advantages:
1. Improves Germination Rates
One of the primary benefits of using a seed dibber tool is its ability to improve germination rates. By creating planting holes at the perfect depth and spacing for your seeds, a dibber ensures that every seed has the best possible start. This can lead to more uniform, vigorous, and successful germination, resulting in healthier, more productive plants.
Additionally, consistent planting depth and spacing can reduce the risk of seed rot, drying out, or competition for resources. This can further improve germination rates and lead to a more successful garden.
2. Saves Time and Effort
A seed dibber tool can save you time and effort by making the planting process quicker, easier, and more efficient. Instead of painstakingly measuring and digging each hole by hand, you can quickly and accurately create a row of perfectly spaced planting holes. This can be especially important for gardeners planting large areas or multiple rows of crops.
Additionally, using a dibber can help you achieve more consistent results, reducing the need for thinning or transplanting later on. This can save you even more time and effort in the long run.
3. Enhances Plant Health
By ensuring that your seeds are planted at the correct depth and spacing, a seed dibber tool can enhance the health and vitality of your plants. Proper depth and spacing allow for optimal root growth, water infiltration, and nutrient absorption, leading to stronger, more vigorous plants. Additionally, consistent planting can reduce competition for resources, further promoting plant health and productivity.
Additionally, using a dibber can help you avoid overcrowding or uneven planting, which can lead to stunted growth, poor health, or reduced productivity. This can result in a more beautiful, productive, and successful garden.
4. Promotes Uniform Growth
A seed dibber tool helps promote uniform growth by ensuring that your seeds are planted at the same depth and spacing. This can lead to more consistent germination, growth, and maturity, resulting in a more uniform and visually appealing garden. Additionally, uniform growth can make it easier to manage and harvest your crops, as they’ll all be at a similar stage of development.
Additionally, consider the type of plants you’re growing. Some plants, like carrots or radishes, may require more precise spacing to ensure proper growth and development. Others, like beans or peas, may be more forgiving and can handle slightly less precision.
5. Reduces Seed Waste
Using a seed dibber tool can help reduce seed waste by ensuring that you plant the right number of seeds in each hole. This can prevent overplanting or underplanting, which can lead to wasted seeds or poor results. Additionally, by achieving more consistent germination and growth, you can make the most of your seeds and create a more productive and successful garden.
Additionally, consider the cost of your seeds. Some seeds, like heirloom or organic varieties, can be more expensive than others. Using a dibber can help you make the most of your investment and achieve the best possible results.
Conclusion
A seed dibber tool is a simple yet powerful device for achieving accurate, efficient, and successful planting. By choosing the right dibber, using it effectively, and avoiding common mistakes, you can improve germination rates, save time and effort, enhance plant health, promote uniform growth, and reduce seed waste. Whether you’re a beginner or a seasoned gardener, a seed dibber can help you achieve professional-level results and create a thriving, productive garden.
Remember, the best way to use a seed dibber tool is to work with your soil and seeds, not against them. Take your time, use the right technique, and maintain your tool to ensure it performs at its best. With a little practice and attention, your seed dibber can become an essential part of your gardening toolkit.
Have you used a seed dibber tool for planting in your garden? Share your tips, favorite tools, or planting experiences in the comments below! If you found this article helpful, don’t forget to share it with your fellow gardeners. Here’s to more accurate, efficient, and successful planting!
FAQs
What is a seed dibber tool?
A seed dibber tool is a manual gardening tool designed for creating uniform planting holes at the perfect depth and spacing for your seeds. It helps ensure consistent, accurate planting, which is critical for healthy germination and growth.
How do I use a seed dibber tool for accurate planting?
Prepare your soil, choose the right depth for your seeds, mark your rows, create the planting holes with your dibber, plant your seeds, and cover and water them thoroughly. Follow the specific recommendations for the seeds you’re planting to ensure optimal results.
What are the best types of seed dibber tools?
The best types of seed dibber tools include traditional wooden dibbers, adjustable dibbers, multi-row dibbers, wheel dibbers, and handheld seed dibbers. Each type offers its own advantages, so choose the one that best suits your specific needs and planting style.
How do I avoid overcrowding my seeds when using a seed dibber?
Follow the spacing recommendations for the specific seeds you’re planting, and use your dibber to create planting holes at the correct distance. Additionally, consider the mature size of your plants when spacing them out to ensure they have enough room to grow and thrive.
How do I care for my seed dibber tool?
Rinse your dibber with water after each use to remove soil and debris, dry it thoroughly to prevent rust or deterioration, store it in a dry, safe place, sharpen the tip occasionally, and apply a light coat of oil or wax to wooden dibbers to prevent drying or cracking.
