

I still remember the first time I tried transplanting seedlings without the right tool. My hands were cramped, the roots were damaged, and half of my poor little plants didn’t survive the move. That’s when I discovered the magic of a good transplanter tool. It wasn’t just about making the job easier—it was about giving my plants the best possible start in their new home. A transplanter tool helps you move seedlings or small plants with minimal stress to their delicate roots, ensuring they thrive in their new location. Whether you’re moving seedlings from a tray to the garden or relocating established plants, the right tool can make all the difference.
Transplanting is a critical step in the life of many plants, and doing it correctly can mean the difference between a thriving garden and a struggling one. If you’re serious about giving your plants the best chance to grow, understanding the essentials of a transplanting tool guide can help you master the art of transplanting. According to a study by the University of Nebraska-Lincoln, properly transplanted seedlings can establish up to 50% faster and have a significantly higher survival rate than those transplanted without care.
Why a Transplanter Tool Is Essential for Healthy Plant Growth
A transplanter tool is more than just a convenience—it’s a necessity for anyone who wants to give their plants the best possible start. Transplanting can be a stressful experience for plants, as their roots are disturbed and they’re moved from a familiar environment to a new one. A good transplanter tool minimizes this stress by allowing you to lift and move plants with their root ball intact, reducing the risk of damage and shock. According to Gardener’s Supply Company, using the right tool can improve seedling survival rates by up to 40%, making it a critical investment for any gardener.
Additionally, a transplanter tool helps you create the perfect planting hole. The right depth and width ensure that the plant’s roots have enough space to spread out and establish quickly. This is especially important for delicate seedlings or plants with sensitive root systems. For gardeners who grow their own seedlings or frequently move plants around their garden, a transplanter tool can save time, reduce waste, and lead to a more productive and beautiful garden.
For those who practice organic or sustainable gardening, a transplanter tool also allows you to work more efficiently and with less waste. By reducing the number of plants lost to transplant shock, you can make the most of your resources and create a more sustainable garden. Whether you’re a beginner or a seasoned pro, a transplanter tool is an essential part of your gardening toolkit.
Types of Gardening Transplanter Tools
Not all transplanter tools are created equal. The type you choose can impact the ease, efficiency, and success of your transplanting efforts. Here are some of the most popular types to consider:
1. Hand Trowel
A hand trowel is one of the most versatile and commonly used transplanter tools. It features a flat, scoop-shaped blade that’s perfect for digging small holes, lifting seedlings, and moving soil. Hand trowels are ideal for transplanting small seedlings or working in tight spaces, such as raised beds or container gardens. They’re lightweight, easy to use, and often come with ergonomic handles for added comfort.
Additionally, hand trowels are often made from durable materials like stainless steel or carbon steel, which can withstand the rigors of regular use. Some models even come with measurement markings on the blade to help you create planting holes at the perfect depth.
2. Transplanting Spade
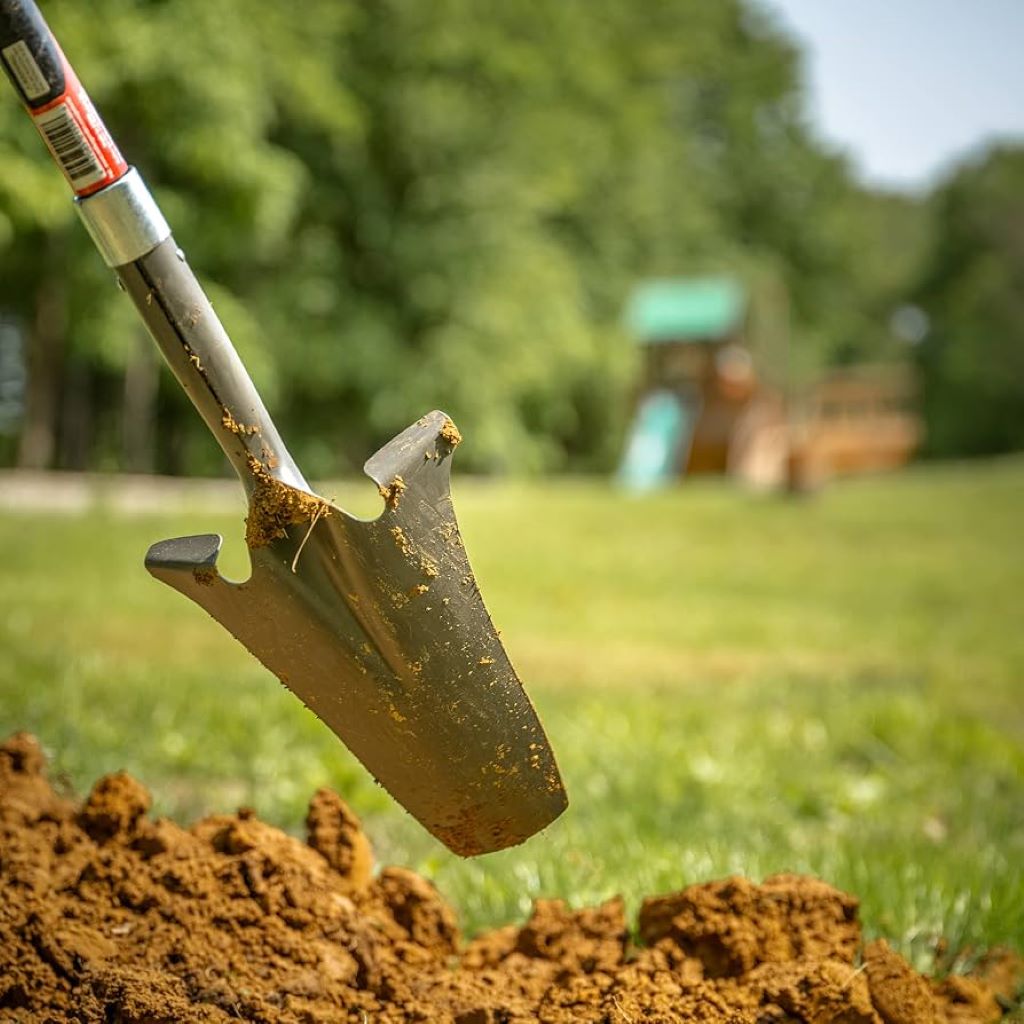
A transplanting spade is a larger, more heavy-duty tool designed for moving bigger plants or working in tougher soil conditions. It features a long, narrow blade that can easily slice through the soil to lift plants with minimal root disturbance. Transplanting spades are ideal for moving established plants, perennials, or shrubs, as well as for working in compacted or rocky soil.
Additionally, transplanting spades often come with a sharp, beveled edge that can cut through roots or tough soil with ease. This makes them a great choice for gardeners who need to transplant larger or more mature plants.
3. Dibber or Dibble
A dibber, also known as a dibble, is a simple but effective tool for creating planting holes at the perfect depth and spacing. It typically features a long, cylindrical or tapered blade that can be pushed into the soil to create a hole for seedlings or bulbs. Dibbers are ideal for transplanting large numbers of seedlings quickly and efficiently, making them a favorite among market gardeners and those planting in rows.
Additionally, dibbers often come with measurement markings to help you achieve consistent depth and spacing. This can be especially useful for gardeners who want to ensure uniform growth and maximize their garden’s productivity.
4. Plug Transplanter
A plug transplanter is a specialized tool designed for moving seedlings grown in plug trays or cell packs. It features a series of small, cylindrical tines that can lift multiple seedlings at once, making it ideal for large-scale transplanting. Plug transplanters are often used by commercial growers or serious gardeners who start their seedlings indoors and then move them to the garden.
Additionally, plug transplanters can save a significant amount of time and effort, as they allow you to transplant multiple seedlings in one motion. This can be especially useful for gardeners who grow a large number of plants from seed.
5. Hori-Hori Knife
A Hori-Hori knife is a versatile, multi-purpose tool that can be used for transplanting, weeding, and even harvesting. It features a sharp, serrated blade on one side and a flat, digging edge on the other, making it ideal for a variety of gardening tasks. The Hori-Hori knife is especially useful for transplanting small seedlings or working in tight spaces, as it allows for precise, controlled digging and lifting.
Additionally, Hori-Hori knives often come with a comfortable, ergonomic handle and a sheath for safe storage. This makes them a practical and convenient choice for gardeners who want a tool that can handle a variety of tasks.
How to Use a Gardening Transplanter Tool for Healthy Plant Growth
Using a transplanter tool effectively can make all the difference in the health and success of your plants. Here’s a step-by-step guide to help you get the most out of your tool:
1. Prepare Your Seedlings
Before you begin transplanting, make sure your seedlings are ready for the move. This means they should be well-rooted, with a strong stem and healthy leaves. If your seedlings are still small or fragile, it’s best to wait until they’re a bit more established before transplanting them. Additionally, water your seedlings thoroughly a few hours before transplanting to help reduce stress and make it easier to lift them from their containers.
Additionally, consider hardening off your seedlings if they’ve been grown indoors or in a greenhouse. This involves gradually exposing them to outdoor conditions over the course of a week or two, helping them acclimate to the temperature, wind, and sunlight they’ll encounter in the garden.
2. Choose the Right Time
The best time to transplant is on a cool, cloudy day or in the late afternoon to reduce stress on the plants. Avoid transplanting on hot, sunny days or when the soil is dry, as this can lead to wilting and shock. Additionally, check the weather forecast to ensure there’s no rain or extreme temperatures expected in the next few days, as this can further stress the plants.
Additionally, consider the season. Early spring or fall is often the best time to transplant, as the temperatures are mild and the plants have time to establish before the heat of summer or the cold of winter sets in.
3. Dig the Planting Hole
Use your transplanter tool to dig a planting hole that’s slightly larger and deeper than the root ball of your seedling. This will give the roots plenty of space to spread out and establish quickly. If you’re using a hand trowel or transplanting spade, insert the blade into the soil at an angle and lift to create the hole. If you’re using a dibber, push it into the soil to the desired depth and then remove it to create the hole.
Additionally, consider the spacing between your planting holes. Different plants have different spacing requirements, so make sure to follow the recommendations for the specific plants you’re transplanting. This can help ensure they have enough room to grow and thrive without competing for resources.
4. Lift the Seedling
Gently lift your seedling from its container using your transplanter tool or your hands. If the seedling is in a plug tray or cell pack, use a plug transplanter or a small trowel to lift it out. Be careful to handle the seedling by its leaves or root ball, avoiding the stem, which can be easily damaged. If the roots are tightly bound or circling the container, gently tease them apart with your fingers to encourage outward growth once planted.
Additionally, consider the size of the root ball. If it’s too large for the planting hole, use your transplanter tool to widen or deepen the hole as needed. This will ensure the seedling has enough space to establish and grow.
5. Plant the Seedling
Place the seedling into the planting hole, making sure it’s at the same depth as it was in its original container. The soil line should be at the same level as the seedling’s stem to prevent it from being buried too deeply or sitting too high. Gently backfill the hole with soil, using your hands or your transplanter tool to press it down lightly around the base of the seedling. Avoid compacting the soil too tightly, as this can restrict root growth and water infiltration.
Additionally, water the seedling immediately after planting to help settle the soil and eliminate any air pockets around the roots. This can also help reduce transplant shock and encourage the seedling to establish quickly.
Common Mistakes to Avoid When Using a Transplanter Tool
Even with the best intentions, it’s easy to make mistakes when using a transplanter tool. Here are some common pitfalls to avoid:
1. Transplanting at the Wrong Time
Transplanting at the wrong time can stress your plants and reduce their chances of survival. Avoid transplanting on hot, sunny days or when the soil is dry, as this can lead to wilting and shock. Instead, choose a cool, cloudy day or the late afternoon to minimize stress on the plants.
Additionally, consider the season and the specific needs of your plants. Some plants, such as cool-season crops, may prefer to be transplanted in early spring or fall, while others, like warm-season crops, may do better in late spring or summer.
2. Damaging the Roots
The roots of your seedlings are delicate and can be easily damaged during transplanting. Avoid pulling or tugging on the seedling’s stem or leaves, as this can cause the roots to break or tear. Instead, handle the seedling by its root ball or leaves, and use your transplanter tool to gently lift it from its container.
Additionally, consider the size and shape of the root ball. If it’s too large or misshapen, it may not fit well into the planting hole, leading to stress or damage. Use your transplanter tool to create a hole that’s the right size and shape for the seedling’s root ball.
3. Planting Too Deep or Too Shallow
Planting your seedlings at the wrong depth can lead to a variety of problems, from poor growth to disease. Avoid planting too deeply, as this can bury the stem and lead to rot or suffocation. Similarly, avoid planting too shallowly, as this can expose the roots and cause them to dry out or become damaged.
Additionally, consider the soil line of the seedling. The soil line should be at the same level as it was in the original container to ensure the seedling is planted at the correct depth.
4. Not Watering Properly
Watering is critical for helping your seedlings establish and recover from the stress of transplanting. Avoid neglecting to water your seedlings immediately after planting, as this can lead to wilting, shock, or even death. Instead, water thoroughly to help settle the soil and eliminate any air pockets around the roots.
Additionally, consider the watering needs of your seedlings in the days and weeks following transplanting. Keep the soil consistently moist but not waterlogged, as this can help the seedlings establish and grow without becoming stressed or damaged.
5. Overcrowding Your Plants
Overcrowding your plants can lead to competition for resources, such as water, nutrients, and sunlight. Avoid planting your seedlings too closely together, as this can result in stunted growth, poor health, and reduced productivity. Instead, follow the spacing recommendations for the specific plants you’re transplanting to ensure they have enough room to grow and thrive.
Additionally, consider the mature size of your plants when spacing them out. Some plants, such as tomatoes or squash, can grow quite large and may require more space than smaller plants like lettuce or herbs.
Tips for Getting the Most Out of Your Transplanter Tool
To maximize the benefits of your transplanter tool, follow these tips for healthy plant growth and successful transplanting:
1. Use the Right Tool for the Job
Different transplanter tools are designed for different tasks, so make sure to choose the right one for your specific needs. For example, a hand trowel is ideal for transplanting small seedlings or working in tight spaces, while a transplanting spade may be better suited for larger plants or tougher soil conditions. Using the right tool can make your job easier, more efficient, and more successful.
Additionally, consider the size and shape of your transplanter tool. A tool with a narrow, tapered blade may be better for creating precise planting holes, while a tool with a wider, flat blade may be more suitable for lifting and moving larger plants.
2. Prepare Your Soil
Before transplanting, take the time to prepare your soil to give your seedlings the best possible start. Remove any weeds, rocks, or debris that could interfere with the planting process or compete with your seedlings for resources. Additionally, loosen the soil to a depth of at least 6-12 inches to ensure the roots have plenty of space to spread out and establish.
Additionally, consider adding organic matter, such as compost or well-rotted manure, to your soil before transplanting. This can improve soil fertility, structure, and water retention, providing a boost to your seedlings’ health and growth.
3. Handle Seedlings with Care
Seedlings are delicate and can be easily damaged during transplanting. Handle them with care, lifting them by their root ball or leaves and avoiding the stem. Additionally, consider using a transplanter tool to gently lift and move the seedlings, reducing the risk of damage or stress.
Additionally, pay attention to the roots of your seedlings. If they’re tightly bound or circling the container, gently tease them apart with your fingers to encourage outward growth once planted. This can help prevent the roots from becoming girdled or restricted, which can lead to poor growth or even death.
4. Water Thoroughly After Transplanting
Watering is critical for helping your seedlings establish and recover from the stress of transplanting. After planting, water your seedlings thoroughly to help settle the soil and eliminate any air pockets around the roots. This can also help reduce transplant shock and encourage the seedlings to establish quickly.
Additionally, consider the watering needs of your seedlings in the days and weeks following transplanting. Keep the soil consistently moist but not waterlogged, as this can help the seedlings establish and grow without becoming stressed or damaged.
5. Monitor and Maintain
After transplanting, monitor your seedlings closely to ensure they’re establishing and growing well. Look for signs of stress, such as wilting, yellowing, or stunted growth, and address any issues promptly. Additionally, consider providing some temporary shade or protection for your seedlings in the first few days after transplanting to help them acclimate to their new environment.
Additionally, maintain your garden by keeping it free of weeds, pests, and diseases. This can help ensure your seedlings have the best possible chance to grow and thrive, leading to a more productive and beautiful garden.
The Benefits of Using a Gardening Transplanter Tool
Using a gardening transplanter tool offers a variety of benefits that can transform your gardening experience and the health of your plants. Here are some of the most notable advantages:
1. Reduces Transplant Shock
One of the primary benefits of using a transplanter tool is its ability to reduce transplant shock. Transplant shock occurs when plants are moved from one environment to another, causing stress and potentially stunting their growth. A transplanter tool helps minimize this shock by allowing you to lift and move plants with their root ball intact, reducing the risk of damage and stress.
Additionally, using a transplanter tool can help you create the perfect planting hole, ensuring that the seedling’s roots have enough space to spread out and establish quickly. This can further reduce transplant shock and improve the seedling’s chances of survival and growth.
2. Improves Plant Survival Rates
Using a transplanter tool can significantly improve the survival rates of your seedlings and plants. By reducing transplant shock and minimizing root damage, a transplanter tool helps ensure that your plants have the best possible start in their new home. This can lead to healthier, more vigorous plants that are better able to withstand pests, diseases, and environmental stresses.
Additionally, using a transplanter tool can help you transplant more efficiently and with less waste. This can be especially important for gardeners who grow their own seedlings or frequently move plants around their garden, as it allows you to make the most of your resources and create a more productive and sustainable garden.
3. Saves Time and Effort
A transplanter tool can save you time and effort by making the transplanting process quicker, easier, and more efficient. Instead of struggling to dig holes or lift seedlings with your hands, a transplanter tool allows you to work more precisely and with less physical strain. This can be especially important for gardeners with large gardens or those who transplant frequently.
Additionally, using a transplanter tool can help you achieve more consistent results. By creating planting holes at the perfect depth and spacing, you can ensure that your seedlings have the best possible chance to establish and grow uniformly.
4. Enhances Soil Structure
Using a transplanter tool can also enhance the structure of your soil. By digging and lifting the soil to create planting holes, you can break up compaction and improve aeration and drainage. This can lead to healthier, more fertile soil that’s better able to support plant growth and retain water and nutrients.
Additionally, using a transplanter tool can help you incorporate organic matter or amendments into your soil more effectively. By mixing in compost, manure, or other organic materials as you dig, you can improve soil fertility and structure, providing a boost to your plants’ health and growth.
5. Promotes Healthy Root Growth
A transplanter tool helps promote healthy root growth by allowing you to create planting holes that are the perfect size and shape for your seedlings’ root balls. This gives the roots plenty of space to spread out and establish quickly, leading to stronger, more vigorous plants. Additionally, by minimizing root damage and stress during transplanting, a transplanter tool helps ensure that your plants can focus their energy on growth and development rather than recovery.
Additionally, using a transplanter tool can help you achieve more consistent root growth across your garden. By planting seedlings at the same depth and spacing, you can ensure that they have equal access to water, nutrients, and sunlight, leading to more uniform and productive growth.
Conclusion
A gardening transplanter tool is a simple yet powerful tool for improving the health and success of your plants. By using it to transplant your seedlings and plants with care and precision, you can reduce transplant shock, improve survival rates, save time and effort, enhance soil structure, and promote healthy root growth. Whether you’re a beginner or a seasoned pro, a transplanter tool can help you create a thriving, productive garden that’s the envy of your neighborhood.
Remember, the best way to use a transplanter tool is to work with your plants, not against them. Take your time, handle your seedlings with care, and use the right technique to ensure they have the best possible start in their new home. With a little practice and attention, your transplanter tool can become an essential part of your gardening toolkit.
Have you used a gardening transplanter tool to move your plants? Share your tips, favorite tools, or gardening experiences in the comments below! If you found this article helpful, don’t forget to share it with your fellow gardeners. Here’s to healthier plants and a more beautiful garden!
FAQs
What is a gardening transplanter tool?
A gardening transplanter tool is a manual tool designed to help you lift, move, and plant seedlings or small plants with minimal stress to their roots. It’s used to create planting holes, lift seedlings from their containers, and ensure they’re planted at the correct depth and spacing for optimal growth.
How do I use a gardening transplanter tool for healthy plant growth?
Prepare your seedlings by ensuring they’re well-rooted and watered, choose the right time for transplanting, dig the planting hole with your transplanter tool, lift the seedling gently, and plant it at the correct depth. Water thoroughly after planting to help the seedling establish and reduce transplant shock.
What are the best types of gardening transplanter tools?
The best types of gardening transplanter tools include hand trowels, transplanting spades, dibbers, plug transplanters, and Hori-Hori knives. Each type offers its own advantages, so choose the one that best suits your specific needs and the size of your plants.
How do I avoid damaging my seedlings when transplanting?
Handle seedlings by their root ball or leaves, avoiding the stem, and use your transplanter tool to gently lift them from their containers. Additionally, create planting holes that are the right size and shape for the seedling’s root ball, and avoid planting too deeply or too shallowly.
How do I care for my transplanter tool?
Rinse your transplanter tool with water after each use to remove soil and debris, dry it thoroughly to prevent rust, and store it in a dry place. Additionally, sharpen the blade occasionally with a file to maintain its effectiveness, and apply a light coat of oil to prevent corrosion.
