

There’s something deeply satisfying about working the soil with your hands, feeling the earth loosen and breathe beneath your fingers. I still remember the first time I used a garden hand fork to aerate my vegetable patch. The difference was immediate—my plants seemed to stand taller, their roots stretched deeper, and the soil felt alive in a way it never had before. A garden hand fork isn’t just a tool; it’s a way to connect with your garden on a deeper level, ensuring your plants get the air, water, and nutrients they need to thrive.
Soil aeration is one of the most overlooked yet vital aspects of gardening. Compacted soil can suffocate plant roots, leading to poor growth, waterlogging, and nutrient deficiencies. If you’re looking to revitalize your garden, understanding the proper garden hand fork use can help you achieve better soil structure and healthier plants. According to a study by the University of California Agriculture and Natural Resources, proper soil aeration can increase plant growth by up to 30% by improving root development and water absorption.
Why Soil Aeration Matters for Your Garden
Soil aeration is the process of loosening the soil to allow air, water, and nutrients to penetrate deeply. This is crucial because compacted soil restricts root growth, reduces microbial activity, and prevents water from draining properly. When soil is too dense, plant roots struggle to access the oxygen they need, leading to stunted growth and increased susceptibility to diseases. According to Gardener’s World, aerating your soil can also enhance the activity of beneficial microbes, which break down organic matter and release nutrients that plants can absorb.
Additionally, aerated soil improves water infiltration and retention. Instead of water pooling on the surface or running off, it seeps into the ground, reaching the roots where it’s needed most. This is especially important in clay-heavy soils, which are prone to compaction and poor drainage. For gardeners dealing with hardpan or heavily trafficked areas, regular aeration can prevent soil from becoming a brick-like barrier that chokes plant life.
For those who practice organic gardening, a hand fork is an invaluable tool. Unlike mechanical aerators, which can disrupt soil structure and harm beneficial organisms, a hand fork allows you to gently loosen the soil without causing excessive disturbance. This preserves the delicate balance of your garden’s ecosystem while still providing the aeration your plants crave.
Types of Garden Hand Forks
Not all garden hand forks are created equal. The type you choose can impact the efficiency and effectiveness of your soil aeration efforts. Here are some of the most common types to consider:
1. Standard Garden Fork
The standard garden fork is a versatile tool with four to six sturdy, slightly curved tines. It’s ideal for general-purpose aeration in most soil types, from loose loam to heavier clay. The curved tines help lift and turn the soil, breaking up compaction and allowing air to circulate. This type of fork is a staple in most garden sheds and is perfect for both small and large gardens.
Additionally, standard garden forks often come with ergonomic handles, reducing strain on your hands and wrists during extended use. They’re durable and designed to withstand the rigors of regular gardening tasks.
2. Broadfork
A broadfork, also known as a U-bar or greensand fork, is a larger, more heavy-duty tool designed for deep soil aeration. It features long, sturdy tines that can penetrate up to 12-18 inches into the ground, making it ideal for breaking up hardpan and deeply compacted soil. Unlike a standard fork, a broadfork is used by stepping on a crossbar to drive the tines into the soil, then rocking it back and forth to loosen the ground without turning it over.
Additionally, broadforks are excellent for no-till gardening, as they aerate the soil without disrupting its layers or harming the microbial life within. This makes them a favorite among organic gardeners and those practicing regenerative agriculture.
3. Pitchfork
A pitchfork is a more robust version of the standard garden fork, with thicker, more widely spaced tines. It’s designed for heavier-duty tasks, such as turning compost piles or breaking up densely packed soil. While not as precise as a standard garden fork, a pitchfork can be useful for larger-scale aeration projects or tougher soil conditions.
Additionally, pitchforks often have longer handles, providing more leverage for deep penetration and heavy lifting. This can be especially useful for gardeners dealing with rocky or root-filled soil.
4. Hand Cultivator Fork
A hand cultivator fork is a smaller, more lightweight tool designed for precision work in tight spaces, such as between rows of plants or in raised beds. It typically has three to five thin, sharp tines that can easily slide into the soil to loosen it without disturbing nearby plants. This type of fork is ideal for weeding, aerating around delicate plants, and working in container gardens.
Additionally, hand cultivator forks are often used for mixing in amendments like compost or fertilizer, ensuring they’re evenly distributed throughout the soil.
5. Digging Fork
A digging fork is similar to a standard garden fork but with flatter, more closely spaced tines. It’s designed for digging and lifting soil, making it ideal for tasks like harvesting root crops or transplanting seedlings. While not specifically designed for aeration, a digging fork can still be used to loosen compacted soil, especially in smaller garden beds.
Additionally, digging forks are often used in conjunction with other tools, such as spades or trowels, to prepare garden beds for planting.
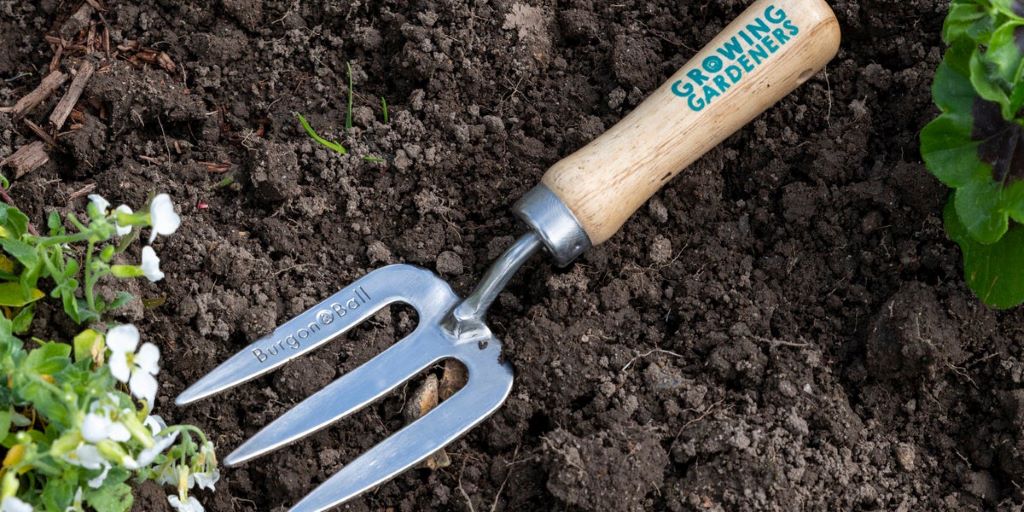
How to Use a Garden Hand Fork for Soil Aeration
Using a garden hand fork effectively can make all the difference in the health and vitality of your garden. Here’s a step-by-step guide to help you get the most out of your tool:
1. Choose the Right Time
The best time to aerate your soil is when it’s slightly moist but not waterlogged. Dry, hard soil can be difficult to penetrate, while overly wet soil can become compacted further as you work it. Aim for a time when the soil is crumbly and easy to work with, typically a day or two after a light rain or watering.
Additionally, consider the season. Early spring or fall is often the best time to aerate, as the soil is usually at the right moisture level, and the weather is mild enough for comfortable gardening.
2. Prepare the Area
Before you begin, clear the area of any debris, weeds, or large rocks that could interfere with your fork’s tines. If you’re working in a planted bed, be mindful of the roots of your existing plants. Try to work around them as much as possible to avoid causing damage.
Additionally, mark off the area you plan to aerate to ensure you cover the entire space evenly. This can help you avoid missing spots or overworking certain areas.
3. Insert the Fork
Hold the garden hand fork with both hands, gripping the handle firmly. Position the tines at the edge of the area you want to aerate, then push down with your foot on the fork’s shoulder (the part where the tines meet the handle). Use your body weight to drive the tines into the soil as deeply as possible, ideally to a depth of 6-12 inches.
Additionally, angle the fork slightly backward as you insert it. This can help lift and loosen the soil more effectively, breaking up compaction and allowing air to penetrate.
4. Lift and Loosen
Once the tines are fully inserted, lift the fork slightly and rock it back and forth to loosen the soil. Avoid turning the soil over, as this can disrupt its structure and harm beneficial microbes. Instead, focus on creating small holes and cracks that allow air, water, and nutrients to reach the roots.
Additionally, work in a systematic pattern, moving backward across the area to avoid stepping on the soil you’ve already aerated. This can help prevent recompaction and ensure even coverage.
5. Repeat and Refine
Continue inserting and lifting the fork across the entire area, working in sections to ensure you cover the whole space. For larger gardens, consider using a broadfork to save time and effort. For smaller or more delicate areas, a hand cultivator fork may be more appropriate.
Additionally, pay attention to areas that seem particularly compacted or waterlogged. These may require extra passes with the fork to fully loosen the soil and improve drainage.
Common Mistakes to Avoid When Using a Garden Hand Fork
Even with the best intentions, it’s easy to make mistakes when using a garden hand fork for soil aeration. Here are some common pitfalls to avoid:
1. Aerating at the Wrong Time
Aerating when the soil is too dry or too wet can do more harm than good. Dry soil can be difficult to penetrate and may crack or crumble excessively, while waterlogged soil can become further compacted as you work it. Avoid aerating in these conditions, and instead, wait for the soil to reach the ideal moisture level—slightly damp but not soggy.
Additionally, consider the weather forecast. If heavy rain is expected soon after aerating, the soil may become compacted again before the plants can benefit from the improved structure.
2. Overworking the Soil
While it’s important to loosen compacted soil, overworking it can disrupt its structure and harm the beneficial microbes and organisms that live within it. Avoid excessive forking or turning the soil, as this can break down aggregates and lead to further compaction over time.
Additionally, be mindful of the depth at which you’re working. Shallow aeration may not reach the roots of your plants, while overly deep aeration can bring up subsoil that’s less fertile and harder for roots to penetrate.
3. Using the Wrong Tool
Not all forks are suited for soil aeration. Avoid using a pitchfork or digging fork for general aeration, as their thicker, more widely spaced tines are designed for heavier-duty tasks and may not provide the precision or gentleness needed for effective aeration.
Additionally, consider the size of your garden and the type of soil you’re working with. A standard garden fork may be sufficient for small, loose soil beds, while a broadfork may be necessary for larger or more compacted areas.
4. Ignoring Existing Plants
When aerating around established plants, it’s important to avoid damaging their roots. Avoid inserting the fork too close to the base of plants, as this can sever roots and cause stress or damage. Instead, work carefully around the root zone, focusing on the areas between plants where the soil is most likely to be compacted.
Additionally, consider the type of plants you’re working around. Shallow-rooted plants, such as lettuce or herbs, may be more sensitive to disruption than deep-rooted plants like tomatoes or shrubs.
5. Skipping Follow-Up Care
Aerating your soil is just the first step in improving its health. Avoid neglecting follow-up care, such as watering, mulching, or adding organic matter. After aerating, water the soil thoroughly to help settle it and encourage root growth. Additionally, consider adding a layer of compost or mulch to provide nutrients and further improve soil structure.
Additionally, monitor your plants in the days and weeks following aeration. Look for signs of improved growth, such as greener leaves, stronger stems, or more vigorous root development. If you notice any issues, such as wilting or yellowing, it may be a sign that the soil was disrupted too much or that the plants are experiencing stress.
Tips for Getting the Most Out of Your Garden Hand Fork
To maximize the benefits of your garden hand fork, follow these tips for optimal soil aeration and garden health:
1. Aerate Regularly
Regular aeration can prevent soil compaction from becoming a problem in the first place. Aim to aerate your garden at least once or twice a year, or more frequently if you have heavy clay soil or high foot traffic. This can help maintain loose, healthy soil and prevent the buildup of hardpan.
Additionally, consider aerating before planting new crops or seedlings. This can help create a loose, welcoming environment for roots to establish and grow.
2. Combine with Organic Matter
After aerating, take the opportunity to mix in organic matter like compost, well-rotted manure, or leaf mold. This can improve soil fertility, structure, and water retention, providing a boost to your plants’ health and growth. Organic matter also encourages the activity of beneficial microbes, which further enhance soil aeration and nutrient availability.
Additionally, consider the type of organic matter you use. Compost is a great all-around amendment, while manure can provide a more concentrated source of nutrients. Leaf mold, on the other hand, is excellent for improving soil structure and moisture retention.
3. Use the Right Technique
The way you use your garden hand fork can impact the effectiveness of your aeration efforts. Instead of simply stabbing the fork into the soil, try to lift and loosen it as you go. This creates small pockets of air and improves water infiltration without disrupting the soil’s natural layers.
Additionally, consider the angle at which you insert the fork. A slight backward angle can help lift and loosen the soil more effectively, while a forward angle may be better for breaking up hardpan or deeply compacted areas.
4. Aerate Before Watering
Aerating your soil before watering can help improve water infiltration and retention. The small holes and cracks created by the fork allow water to seep into the ground more easily, reaching the roots where it’s needed most. This can be especially useful in clay-heavy soils, which are prone to waterlogging and poor drainage.
Additionally, consider the timing of your watering. Watering immediately after aerating can help settle the soil and encourage root growth. However, avoid watering too heavily, as this can lead to further compaction or erosion.
5. Monitor Soil Health
Regularly monitoring the health of your soil can help you determine when and how often to aerate. Look for signs of compaction, such as water pooling on the surface, slow plant growth, or roots growing shallowly. Additionally, consider conducting a simple soil test to check for nutrient deficiencies or pH imbalances.
Additionally, pay attention to the activity of earthworms and other beneficial organisms in your soil. A healthy population of earthworms is a sign of good soil structure and aeration, as they require oxygen to thrive and contribute to further loosening the soil as they burrow.
The Benefits of Using a Garden Hand Fork for Soil Aeration
Using a garden hand fork for soil aeration offers a variety of benefits that can transform the health and productivity of your garden. Here are some of the most notable advantages:
1. Improves Root Growth
One of the primary benefits of soil aeration is its ability to improve root growth. Loose, well-aerated soil allows roots to penetrate deeply and spread out more easily, accessing water and nutrients that may be out of reach in compacted soil. This can lead to stronger, healthier plants with more vigorous growth and higher yields.
Additionally, deep root growth can improve plants’ resilience to drought and other stresses, as roots can access moisture and nutrients from a larger volume of soil.
2. Enhances Water Drainage
Aerated soil allows water to drain more effectively, preventing waterlogging and the associated problems of root rot, fungal diseases, and nutrient leaching. Instead of pooling on the surface or running off, water seeps into the ground, reaching the roots where it’s needed most. This can be especially important in clay-heavy soils, which are prone to poor drainage and compaction.
Additionally, improved drainage can help prevent erosion and the loss of topsoil, which is rich in organic matter and nutrients. This can help maintain the fertility and structure of your garden over time.
3. Boosts Microbial Activity
Soil aeration encourages the activity of beneficial microbes, such as bacteria, fungi, and earthworms. These organisms require oxygen to thrive and play a crucial role in breaking down organic matter, releasing nutrients, and improving soil structure. By aerating your soil, you create a more hospitable environment for these microbes, which in turn can enhance plant health and growth.
Additionally, a healthy population of soil microbes can improve the soil’s ability to retain nutrients and resist diseases. This can lead to more robust, resilient plants that are better able to withstand pests, diseases, and environmental stresses.
4. Reduces Soil Compaction
Regular aeration can prevent soil compaction from becoming a problem in the first place. Compacted soil restricts root growth, reduces water infiltration, and limits the activity of beneficial microbes. By loosening the soil with a garden hand fork, you can break up hardpan and improve its structure, allowing for better air, water, and nutrient circulation.
Additionally, aeration can help prevent the formation of crusts on the soil surface, which can impede water infiltration and seed germination. This can be especially important in gardens with heavy foot traffic or clay-heavy soils.
5. Enhances Nutrient Availability
Aerated soil allows nutrients to move more freely through the ground, making them more accessible to plant roots. This can improve the efficiency of fertilizers and other amendments, ensuring that your plants get the most out of the nutrients you provide. Additionally, the increased activity of soil microbes can help break down organic matter and release nutrients in a form that plants can absorb.
Additionally, improved soil structure can enhance the retention of nutrients, preventing them from leaching away with water or becoming locked up in compacted layers. This can lead to more fertile, productive soil and healthier, more vigorous plants.
Conclusion
A garden hand fork is a simple yet powerful tool for improving the health and vitality of your garden. By using it to aerate your soil, you can enhance root growth, improve water drainage, boost microbial activity, reduce compaction, and increase nutrient availability. Whether you’re a seasoned gardener or just starting out, a garden hand fork can help you create a thriving, productive garden that’s the envy of your neighborhood.
Remember, the best way to use a garden hand fork is to work with the soil, not against it. Take your time, use the right technique, and avoid overworking the ground. With a little care and attention, your soil—and your plants—will thank you with lush, vibrant growth.
Have you used a garden hand fork to aerate your soil? Share your tips, favorite tools, or gardening experiences in the comments below! If you found this article helpful, don’t forget to share it with your fellow gardeners. Here’s to healthier soil and happier plants!
FAQs
What is a garden hand fork?
A garden hand fork is a manual gardening tool with a long handle and several sturdy tines designed for loosening, lifting, and aerating soil. It’s used to improve soil structure, enhance root growth, and promote better water and nutrient absorption.
How do I use a garden hand fork for soil aeration?
Choose the right time when the soil is slightly moist, prepare the area by clearing debris, insert the fork deeply into the soil, lift and loosen without turning the soil over, and repeat systematically across the area. Work in sections to ensure even coverage and avoid recompaction.
What are the best types of garden hand forks for aeration?
The best types of garden hand forks for aeration include standard garden forks, broadforks, hand cultivator forks, and digging forks. Each type offers its own advantages, so choose the one that best suits your soil type, garden size, and specific needs.
How often should I aerate my garden soil?
Aim to aerate your garden soil at least once or twice a year, or more frequently if you have heavy clay soil, high foot traffic, or signs of compaction. Regular aeration can prevent soil from becoming too dense and improve overall garden health.
How do I care for my garden hand fork?
Rinse your garden hand fork with water after each use to remove soil and debris, dry it thoroughly to prevent rust, and store it in a dry place. Additionally, sharpen the tines occasionally with a file to maintain their effectiveness, and apply a light coat of oil to prevent corrosion.
