

Starting a Litheli 14-inch cordless lawn mower takes only a few deliberate steps. Charge the battery, install it correctly, then engage the lock-off button and bail lever. The Litheli 14-inch cordless lawn mower uses a compact 14-inch deck and five cutting-height positions. Those specifications make it practical for controlled mowing around smaller residential lawns.
Key Takeaways:
- Fully charge and correctly seat the battery before starting.
- Inspect the lawn and remove stones, sticks, wires, and other debris.
- Keep the mower on stable ground before engaging its controls.
- Press the lock-off button before pulling the bail lever toward the handle.
- Release the bail lever completely when you need to stop.
- Remove the battery before cleaning, servicing, or clearing stubborn debris.
Understand the Starting System Before You Begin
The Litheli mower uses a two-step starting system rather than a traditional pull cord. This design reduces accidental activation while keeping startup quick and straightforward.
First, the battery supplies electrical power to the mower. Next, the lock-off button and bail lever activate the motor through deliberate hand movements.
Therefore, pressing only one control will not start the mower. You must engage the controls in their intended sequence for the motor to operate.
Know the Main Controls
Before starting, identify the battery compartment, lock-off button, and bail lever. Also locate the height adjustment lever and grass collection components.
The operator’s manual identifies the lock-off button as a safety control. The bail lever controls the mower’s running function during normal operation.
Consequently, learning these controls first prevents confusion during your first startup. It also helps you recognize normal operation versus a potential fault.
Prepare the Mower for Its First Start
Do not rush directly from unboxing into mowing. A quick preparation check protects the mower and helps prevent avoidable startup problems.
Complete the Assembly
Confirm that the handle assembly sits firmly and every fastener holds correctly. Do not operate the mower while any handle component remains loose.
Check the grass bag, discharge area, wheels, and adjustment mechanism before powering the machine. Also inspect the mower deck for visible damage or loose components.
If anything looks damaged after unpacking, stop the setup process immediately. Contact the appropriate support channel instead of attempting an improvised repair.
Charge the Battery Fully
A properly charged battery gives the motor the electrical reserve required for startup and mowing. Therefore, charge the battery before your first mowing session.
Check the battery indicators before installation when your battery design provides them. A low charge can create unnecessary confusion when diagnosing a mower that will not start.
Keep the battery and charging equipment away from moisture during charging. Also follow the charging instructions supplied with your specific Litheli battery.
How To Start the Litheli 14-Inch Mower
Once assembly, charging, and inspection are complete, move to a clear, stable area. Keep your hands and feet away from the cutting deck throughout the process.
Step 1: Inspect the Mowing Area
Walk across the intended mowing area before starting the mower. Remove stones, branches, toys, wires, and other objects from the grass.
These objects can damage the blade or become dangerous projectiles during operation. Also keep people and pets away from the immediate mowing area.
For better results, choose dry grass whenever practical. Wet grass can increase clogging and make consistent cutting more difficult.
Step 2: Set the Cutting Height
Adjust the cutting height while the mower remains switched off. Remove the battery whenever your adjustment procedure requires additional protection.
The 14-inch Litheli model offers five cutting-height positions. Choose a higher setting when the grass has grown unusually tall.
For routine mowing, avoid removing excessive grass during one pass. Gradual height changes generally produce a cleaner and less stressful mowing session.
Step 3: Install the Battery
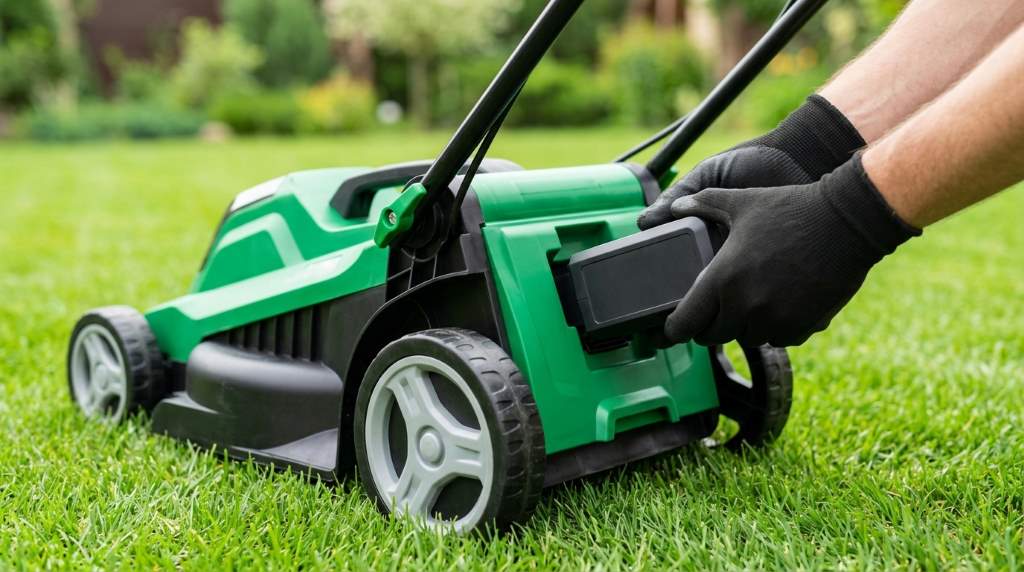
Open the battery compartment and insert the fully charged battery correctly. Push the battery firmly until it seats securely in its compartment.
Then close the battery compartment cover completely. A poorly seated battery can prevent the mower from starting or interrupt normal operation.
Never force a battery into the compartment. If the battery does not fit naturally, inspect its orientation and compatibility before continuing.
Step 4: Position Yourself Correctly
Stand behind the mower with both feet on stable ground. Keep your hands positioned where you can control the handle comfortably.
Do not stand directly beside the cutting deck during startup. Maintain a balanced stance that allows you to release the bail lever quickly.
Also confirm that the mower does not point toward people, pets, windows, or fragile objects. This simple check adds another layer of practical protection.
Step 5: Press the Lock-Off Button
Locate the lock-off button on the handle control area. Press and hold this button before engaging the operating lever.
The lock-off system helps prevent accidental motor activation. Therefore, never attempt to bypass or disable this safety control.
Step 6: Pull the Bail Lever
While holding the lock-off button, pull the bail lever toward the handle. Keep the lever engaged while you want the mower to operate.
The motor should start once the controls engage correctly. After the motor starts, follow the model’s operating instructions for continued mowing.
If the mower does not start, do not repeatedly force the controls. Instead, release the lever and begin a systematic inspection.
What To Check When the Mower Does Not Start
A cordless mower that refuses to start usually needs a basic setup check. Start with the battery, controls, assembly, and operating conditions.
| Symptom | Likely Check | Recommended Action |
|---|---|---|
| No motor response | Battery installation | Remove and reseat the battery securely. |
| Battery appears weak | Charge level | Recharge the battery before testing again. |
| Controls do not activate | Lock-off sequence | Press the lock-off button before pulling the bail lever. |
| Mower stops unexpectedly | Grass or overload | Release the lever and inspect the deck safely. |
| Uneven cutting | Height setting or blade | Check height consistency and inspect the blade after removing power. |
Check the Battery Connection First
Battery seating provides the simplest starting point for troubleshooting. Remove the battery only after the mower has completely stopped.
Inspect the battery compartment for obvious obstruction or incorrect positioning. Then reinstall the battery carefully and close the compartment securely.
If the battery remains unresponsive, recharge it using the recommended charging method. Avoid using damaged batteries or charging equipment that shows visible damage.
Repeat the Correct Control Sequence
After confirming battery installation, return to the normal starting sequence. Press the lock-off button first, then pull the bail lever toward the handle.
Do not hold random switches or repeatedly cycle the mower unnecessarily. Correct sequencing gives the safety system the conditions it expects.
Inspect for Grass Blockage
Dense grass can collect beneath the deck and interfere with normal blade movement. However, never reach underneath the mower while the battery remains installed.
Stop the mower completely before performing any inspection. Remove the battery before clearing material from the deck or blade area.
Use appropriate tools and protective gloves when handling the blade area. Never use your bare hands to remove tightly packed grass.
How to Stop the Mower Safely
Stopping the Litheli mower requires releasing the operating lever. Once released, the mower’s blade should stop through its braking system.
Do not immediately restart the mower after stopping. Allow the blade to finish rotating before attempting another startup.
If you leave the mower unattended, remove the battery according to the operating instructions. This prevents accidental activation during storage or maintenance.
How to Get Better Results After Startup
Starting the mower correctly represents only the first part of successful lawn care. Your mowing technique also affects battery use, cut quality, and machine workload.
Choose the Right Cutting Height
Begin with a higher cutting position when grass looks unusually tall. Then lower the setting gradually during subsequent mowing sessions.
Cutting too much grass at once can increase motor load. Therefore, gradual passes often work better than forcing the mower through dense growth.
Mow in Controlled Passes
Push the mower steadily rather than repeatedly accelerating and slowing. Maintain overlapping passes so you avoid leaving narrow strips of uncut grass.
Change your mowing direction periodically when lawn conditions allow. This approach can reduce visible wheel patterns and encourage more consistent coverage.
Keep the mower moving at a controlled pace through thicker areas. If the motor struggles, slow down rather than forcing the machine forward.
Use the Grass Bag Effectively
The grass catcher helps collect clippings and keeps the finished lawn cleaner. Monitor the bag during mowing instead of waiting for severe blockage.
Empty the catcher when it becomes sufficiently full for efficient collection. Always stop the mower before removing or handling the grass bag.
Safety Habits That Matter Most
Electric power does not eliminate lawn mower hazards. The rotating blade can still cause serious injuries or throw objects at significant speed.
Wear appropriate eye protection while operating the mower. Also keep children, pets, and other people away from the operating area.
Never bypass the lock-off mechanism or alter the mower’s safety controls. These systems exist specifically to reduce unintended blade activation.
Additionally, keep the mower away from wet conditions unless your specific operating instructions explicitly permit them. Moisture can create electrical and traction-related risks.
Remove Power Before Maintenance
Always remove the battery before cleaning, inspecting, or servicing the mower. This step should become automatic whenever your hands approach the deck.
Inspect the blade periodically for damage or excessive dullness. A sharp, properly maintained blade generally produces better cutting performance.
Never attempt blade work without proper protection and secure equipment. When uncertain, use qualified service support rather than guessing.
Startup Mistakes to Avoid
- Starting before completing mower assembly.
- Using a partially seated battery.
- Ignoring visible damage after unpacking.
- Starting without clearing objects from the mowing area.
- Bypassing the lock-off button or bail lever.
- Reaching underneath the deck with the battery installed.
- Immediately restarting after releasing the operating lever.
- Forcing the mower through excessively tall or dense grass.
These mistakes often come from rushing rather than technical difficulty. A consistent pre-start routine prevents most avoidable problems before they develop.
A Simple Pre-Mowing Routine
Use the same checklist before every mowing session until the process becomes automatic. Consistency matters more than speed when operating powered cutting equipment.
- Inspect the lawn and remove debris.
- Check the mower for visible damage.
- Confirm the cutting height suits current grass conditions.
- Verify the battery has adequate charge.
- Install the battery securely.
- Close the battery compartment properly.
- Position yourself behind the mower.
- Press the lock-off button.
- Pull the bail lever toward the handle.
- Begin mowing at a controlled pace.
This sequence creates a repeatable starting habit with very little mental effort. More importantly, it keeps safety checks ahead of motor activation.
Understanding the 14-Inch Configuration
The mower’s compact deck suits users who value maneuverability around smaller or more complicated lawn spaces. Its narrower cutting profile can simplify movement near landscaping and tight areas.
The current Litheli 14-inch configuration also appears in multiple battery and package variations. Therefore, verify your exact model before following model-specific specifications.
Some versions list different battery capacities, runtimes, cutting dimensions, or grass-bag capacities. Treat the specifications printed for your exact mower as the final authority.
This distinction matters because similar-looking Litheli models can use different electrical systems. Checking the model identification prevents incorrect assumptions about batteries and operating controls.
Why the Two-Step Start Matters
The starting procedure intentionally requires two separate control actions. That design helps prevent accidental activation when someone handles the mower unexpectedly.
For example, simply touching the handle should not activate the cutting system. You must deliberately engage the lock-off control and operating lever.
Therefore, never modify the sequence to make startup faster. A few additional seconds provide meaningful control during every mowing session.
When You Should Stop Troubleshooting
Basic troubleshooting can resolve many startup problems without technical service. However, repeated failure after correct battery installation deserves professional attention.
Stop using the mower if you notice burning smells, damaged wiring, unusual sparks, or abnormal mechanical sounds. Remove the battery safely and seek qualified assistance.
Likewise, do not continue operating after a significant impact damages the deck or blade. A professional inspection can identify problems that remain invisible externally.
Final Checklist Before You Mow
| Check | Ready Condition |
|---|---|
| Battery | Charged and securely installed |
| Handle | Fully assembled and firmly secured |
| Cutting height | Correct setting selected and locked |
| Lawn | Debris removed from the mowing area |
| Operator position | Standing securely behind the mower |
| Starting controls | Lock-off button and bail lever used correctly |
| Stopping plan | Operator knows to release the bail lever |
Frequently Asked Questions
How do I start a Litheli 14-inch cordless lawn mower?
Install the charged battery, press the lock-off button, then pull the bail lever toward the handle.
Why will my Litheli 14-inch mower not start?
Check the battery charge, battery seating, compartment cover, and correct lock-off and bail-lever sequence.
Does the Litheli mower need a pull cord?
No, the cordless design uses an electrical starting sequence instead of a traditional pull cord.
Should I remove the battery before cleaning the mower?
Yes, remove the battery before cleaning, clearing debris, inspecting the blade, or performing maintenance.
What should I do if the mower stops during cutting?
Release the bail lever, remove the battery, and inspect for low charge, grass buildup, or another obstruction.
Conclusion
Starting a Litheli 14-inch cordless lawn mower becomes simple once you follow the correct sequence. Charge the battery, inspect the mower, clear the lawn, and engage both starting controls deliberately.
Most importantly, treat every startup as a safety procedure rather than merely pressing a button. Follow this checklist consistently, maintain the mower properly, and stop troubleshooting when professional service becomes appropriate.
Before your next mowing session, run through the pre-mowing checklist above. That small habit can make startup faster, safer, and far more predictable.
