

Raised garden beds have become a go-to solution for backyard growers, urban gardeners, and anyone craving more control over their food. Whether you’re aiming for a fresh supply of vegetables, a flower-filled sanctuary, or simply looking to upgrade your outdoor space, building your own raised garden bed is one of the best investments you can make in your home garden.
Why Raised Garden Beds Are a Game-Changer
Raised beds offer several compelling benefits over traditional in-ground gardens. First and foremost, they provide better soil drainage and aeration, which means healthier plant roots. According to the National Gardening Association, raised beds can yield up to four times more produce than the same area planted in rows.
Additionally, raised beds reduce weed invasion, help maintain ideal soil composition, and make gardening more accessible for people with mobility issues. The elevated structure minimizes bending and kneeling, offering a more ergonomic gardening experience. For city dwellers or those with poor native soil, a raised bed also allows full control over the soil mix.
Choosing the Right Materials
Selecting the right materials is crucial for longevity and plant safety. While treated lumber is resistant to rot, many gardeners avoid it due to chemical concerns. However, modern pressure-treated wood is now considered safe for vegetable gardens, as it no longer uses arsenic-based preservatives (source).
For a more natural option, cedar or redwood is highly durable and naturally rot-resistant. If you’re on a budget, reclaimed wood or concrete blocks can work just as well. Just ensure any recycled wood is free from paint, varnish, or chemical treatments.
Recommended Materials:
- 2×6 or 2×8 cedar or redwood boards
- Galvanized screws or deck nails
- Drill and measuring tape
- Weed barrier fabric (optional)
- Soil and compost mix
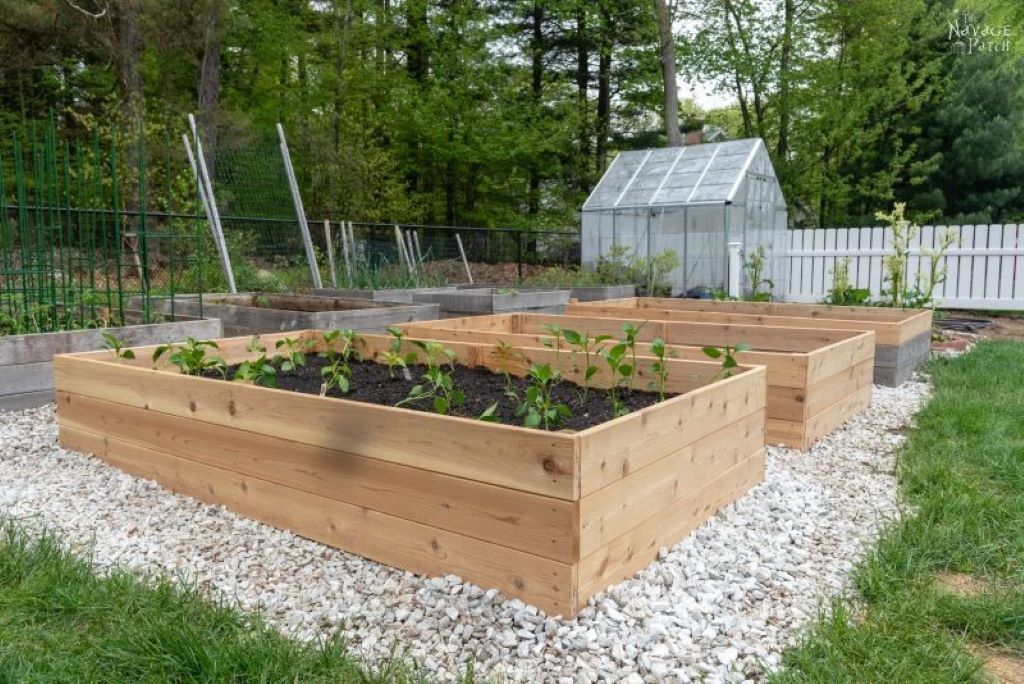
Step-by-Step DIY Tutorial
- Step 1: Plan Your Space
Choose a spot with at least 6–8 hours of sunlight. Measure the area and consider pathways for easy access. A common size is 4×8 feet, which offers plenty of growing space without requiring you to step into the bed. - Step 2: Cut and Assemble the Frame
Cut your boards to the desired length. For a 4×8 bed, you’ll need two 4-foot and two 8-foot boards. Screw the boards together at the corners, making sure they’re square. - Step 3: Prepare the Ground
Clear the ground of grass and debris. If you’re placing the bed on sod, lay down a layer of cardboard or weed fabric to block growth. - Step 4: Set the Bed in Place
Position the frame in your chosen location. Use a level to ensure it sits flat. This helps with even water distribution. - Step 5: Fill With Soil
Use a mix of 60% topsoil, 30% compost, and 10% perlite or coarse sand for optimal drainage. This mix encourages healthy root development and nutrient availability. - Step 6: Water and Plant
Before planting, water the soil thoroughly. Then add your seedlings or seeds based on your planting schedule and zone.
Expert Tips for Best Results
- Rotate your crops annually to prevent soil nutrient depletion and reduce pests.
- Install a drip irrigation system for consistent moisture and less water waste.
- Use companion planting techniques to naturally ward off pests and enhance growth (e.g., marigolds with tomatoes).
Read More: Outdoor Gardening Tips for Modern Urban Homes
Real-World Example: Suburban Transformation
A family in Oregon converted their unused side yard into a 3-bed raised garden system. By using recycled wood and a DIY compost mix, they cut grocery bills by 30% in just one season. The father noted the ease of upkeep and his children loved helping out, turning it into a bonding activity.
Featured Snippet:
Is it cheaper to build or buy a raised garden bed?
Building your own raised garden bed is usually more cost-effective than buying a pre-made one. A DIY 4×8 cedar bed may cost around $60–$100, while store-bought versions often range from $150 to $300 for similar dimensions. Plus, building your own allows customization in size and height. Pre-made beds save time but limit your material choices and design flexibility. For hands-on individuals, DIY is a better value.
Also Read:
Home Gardening for Beginners: How to Start a Thriving Garden at Home
FAQs
1. How deep should a raised garden bed be?
Most raised beds should be at least 12 inches deep to accommodate root growth. Deeper beds may be needed for root vegetables.
2. Can I place a raised bed on concrete or asphalt?
Yes, but ensure you use a barrier like landscaping fabric and add sufficient soil depth to support plant roots.
3. Do I need to line the bottom of a raised bed?
It’s optional. Lining with cardboard or weed fabric can help block weeds and pests while improving drainage.
4. What’s the best wood for raised garden beds?
Cedar and redwood are top choices due to their resistance to decay and insects. Avoid treated wood unless it’s rated safe for gardens.
5. Can I grow vegetables in a raised bed year-round?
With the right crops and a cold frame or hoop house, many gardeners grow vegetables year-round, even in cold climates.
6. How often should I water my raised bed garden?
Raised beds dry out faster. Expect to water 2–3 times a week or more in hot weather. Use mulch to retain moisture.
7. How long do raised garden beds last?
With quality wood like cedar, expect 10–15 years of use. Maintenance and protection from extreme weather can extend this.
Final Thought
Building your own raised garden bed isn’t just a weekend project—it’s a gateway to healthier living, greater sustainability, and hands-on satisfaction. Whether you’re a novice or a seasoned gardener, the benefits of raised bed gardening are undeniable. From improved yields to soil control and ergonomic design, raised beds redefine home gardening.
With just a few tools, some quality materials, and a bit of elbow grease, you can transform a patch of yard into a thriving garden oasis. In a world where food security and sustainability matter more than ever, growing your own produce is a powerful step, and it starts with one easy DIY project.
