

Installing a garden hose management system correctly saves time, protects equipment, and improves outdoor organization. According to landscaping industry surveys, homeowners spend nearly 70 hours annually maintaining their outdoor spaces. Furthermore, properly installed hose storage systems can extend hose lifespan by up to 50%. If you are considering a retractable garden hose reel, proper mounting ensures safety, convenience, and long-term performance. This guide explains exactly how to mount a retractable garden hose reel using professional techniques suitable for homeowners across the USA.
Why Proper Mounting Matters
A retractable hose reel experiences constant tension during use and retraction. Therefore, secure mounting prevents damage to walls and equipment.
Correct installation also improves accessibility and reduces tripping hazards. Additionally, it helps maximize the lifespan of the hose reel mechanism.
Understanding How a Retractable Garden Hose Reel Works
A retractable garden hose reel contains a spring-loaded mechanism that automatically rewinds the hose. This design keeps the hose organized and protected.
Most wall-mounted units swivel between 120 and 180 degrees. Consequently, users can reach multiple areas without repositioning the reel.
Tools and Materials You Will Need
Gathering all necessary tools before starting saves time and prevents installation errors. Preparation also improves safety.
- Retractable garden hose reel kit
- Electric drill
- Masonry or wood drill bits
- Level
- Tape measure
- Pencil or marker
- Socket wrench set
- Wall anchors or expansion bolts
- Safety glasses
- Stud finder
Choosing the Best Mounting Location
Consider Water Supply Access
Select a location close to your outdoor water faucet. This placement reduces the need for additional connectors and adapters.
Furthermore, shorter supply lines reduce water pressure loss. As a result, the hose reel operates more efficiently.
Ensure Adequate Clearance
The hose reel requires enough space to swivel freely. Therefore, avoid installing near corners or obstacles.
Most manufacturers recommend maintaining at least three feet of side clearance. This distance ensures smooth operation.
Choose a Strong Surface
Mount the unit only on structurally sound surfaces. Suitable options include concrete, brick, wood studs, and reinforced walls.
Avoid mounting directly onto vinyl siding or thin panels. These materials cannot support long-term stress.
How to Mount a Retractable Garden Hose Reel on Different Surfaces
Installing on Wood Walls
Begin by locating wall studs using a stud finder. Mark the stud positions carefully with a pencil.
Next, hold the mounting bracket against the wall. Use a level to confirm perfect alignment.
Drill pilot holes into the studs. Then, secure the mounting bracket using heavy-duty lag screws.
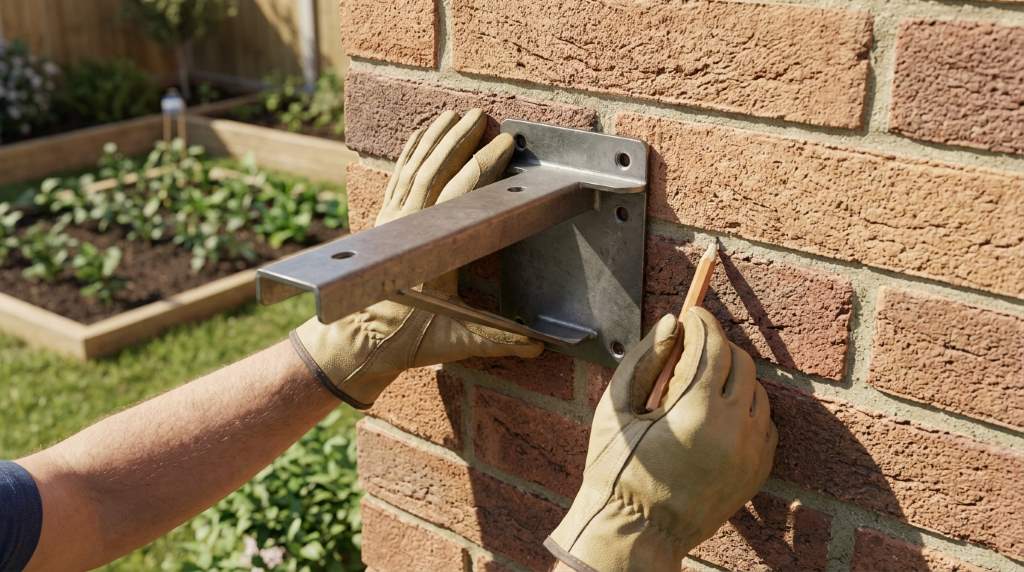
Installing on Brick Walls
Brick walls provide excellent support for retractable hose reels. However, proper anchors remain essential.
Mark the drilling locations accurately. Then, use a masonry drill bit to create anchor holes.
Insert expansion anchors into each hole. Afterward, attach the bracket securely with bolts.
Installing on Concrete Walls
Concrete surfaces offer the strongest mounting option available. Nevertheless, installation requires specialized hardware.
Drill holes using a hammer drill and masonry bit. Subsequently, install concrete anchor bolts securely.
Tighten all fasteners evenly. This process prevents bracket movement during operation.
Step-by-Step Installation Process
Step 1: Measure and Mark
Determine the desired mounting height before drilling. Most installations position the reel between four and five feet high.
Use a measuring tape and level to mark the bracket holes. Accuracy during this stage prevents future problems.
Step 2: Drill the Mounting Holes
Select the appropriate drill bit for your wall material. Wear safety glasses throughout the drilling process.
Drill slowly and maintain steady pressure. This technique produces cleaner and more accurate holes.
Step 3: Install Anchors or Fasteners
Insert wall anchors according to manufacturer recommendations. Verify that each anchor sits flush with the surface.
Strong anchors provide long-term support. Therefore, never substitute lighter hardware.
Step 4: Attach the Mounting Bracket
Position the bracket over the prepared holes. Tighten each fastener gradually and evenly.
Check bracket stability before proceeding. There should be no movement or looseness.
Step 5: Mount the Hose Reel
Lift the retractable hose reel onto the installed bracket. Follow the manufacturer’s locking procedure.
Most models use quick-release mechanisms. These systems simplify maintenance and seasonal storage.
Step 6: Connect the Water Supply
Attach the inlet hose to your outdoor faucet. Tighten all connections securely by hand.
Turn on the water slowly and inspect for leaks. Correct any issues before regular use.
Testing Your Installation
Extend the hose completely to test reel stability. Observe the bracket for any movement.
Allow the hose to retract several times. Smooth operation confirms successful installation.
Check swivel functionality across its entire range. Proper movement prevents unnecessary stress.
Common Installation Mistakes to Avoid
Many homeowners rush the installation process. Consequently, they encounter preventable problems later.
- Mounting onto weak surfaces
- Skipping the level check
- Using incorrect anchors
- Installing too close to obstacles
- Overtightening mounting hardware
- Ignoring manufacturer instructions
Professional Tips for Long-Term Performance
Inspect mounting hardware twice yearly. Regular inspections identify problems before failures occur.
Lubricate moving parts according to manufacturer recommendations. Proper maintenance improves operational life.
Additionally, drain the hose before freezing temperatures arrive. This practice prevents winter damage.
Clean the exterior housing periodically using mild soap and water. Regular cleaning preserves appearance and functionality.
When to Consider Professional Installation
Some installations require advanced tools or expertise. Complex wall materials often present additional challenges.
Consider professional assistance if drilling concrete or masonry feels uncomfortable. Expert installation provides additional confidence.
Professional installation also benefits homeowners with large commercial-grade hose reels. These units often require specialized mounting systems.
Conclusion
Learning how to mount a retractable garden hose reel properly improves convenience, safety, and equipment longevity. Careful planning and precise installation produce professional-quality results.
By selecting the correct location, using appropriate hardware, and following proven installation methods, homeowners throughout the USA can enjoy years of reliable performance. Gather your tools today and install your retractable garden hose reel with confidence.
Frequently Asked Questions
Can I mount a retractable garden hose reel on vinyl siding?
No, you should mount it to studs or structural backing behind the siding.
What is the best mounting height for a hose reel?
Most manufacturers recommend installing the reel between four and five feet above ground.
Can I install a hose reel on a brick wall?
Yes, brick walls provide excellent support when using proper masonry anchors.
How much weight can a mounted hose reel hold?
Most residential retractable hose reels support between 20 and 50 pounds.
Should I remove my hose reel during winter?
In severe climates, removing or winterizing the hose reel helps prevent damage.
